Reclaimed Home

A Fancy Little Side Table (Makeover!)

Here’s the thing about furniture: it’s quite expensive. And even when you can find budget options, if you crave pieces with personality and flair, they almost always cost you. Obvious solution: you gotta do it yourself! YOU be the designer. Open up your imagination and get yourself some paint.

The best part: you can design the PERFECT piece for your space.

With that said, please enjoy a photo essay of my newest side table. It’s purpose is to sit snugly beside the sofa in our bedroom; to me, the boudoir is a place for all things fancy and just a little bit  ooh-la-la-la. And this table definitely turned out that way!

Just a quick ‘heads up’ – this is not a how-to post. I didn’t take a lot of photos of the process, but I hope you’ll enjoy the results!

The $5 table. Scuffed, ugly and oh-so-70’s.

Horrible.

A quick coat of grey primer and we’re off to a good start.

After priming I used two paints: White latex on the base of the table and Gold Krylon spray paint on the top.

All finished! Recap: Two coats of white latex paint on the body (lightly distressed with sand paper) / Gold spray paint on the top / Lovely hardware from Anthropologie! (Not my best photo, I know).

Let’s take a minute to appreciate that fabulous hardware! Two gold and opalescent knobs definitely helped to complete the piece.

Success! The table fits perfectly beside the bedroom sofa.

Of course, a table is never complete until is has been ‘dressed’. I found this to be a wonderful place to display my newly finished butterfly dome!

A glass tray from Home Outfitters serves as a nice alternative to coaters.

My latest find! A very very old framed etching of Notre Dame. (Only $20 at a junk shop- Score!) I can’t help myself when it comes to architectural artwork, especially if it’s le French! It’s always so beautiful. I also added some depth with a framed architectural photograph of my own: a black and white of St. James Cathedral on Church St. in Toronto.

The gigantic bedroom is coming together! Still looks a bit empty… I’ll be sure to let you know when I find a side chair!

My Butterfly Bell Jar

Hmmm… how to start this post? Have you ever tried to express your feelings about something that’s very close to your heart? It’s not so easy, is it? Like trying to write wedding vows; they come our sounding so cheesy, so flat. Words can be quite inconsequential when compared to your true, passionate and overwhelming feelings!

That’s why I don’t know what to write here. You see, this post, this post is about bell jars. Glass Domes. Cloches. Call them what you will. I love them. I LOVE bell jars. I love the way they give immediate importance to anything you put in them. I love that they are dainty and fine and reminiscent of another era. I love their curves and gentle lines. I even love that they are tricky to find; one might say that they’re elusive… I just reeeeally love them, okay?

Chris and I were visiting a junk shop in a nearby small town when I spotted one…

What a great shape. Tall and not too wide. And it was only $25! We purchased it immediately.

Now the question: What to do with the new fancy bell jar?


A quick look around the ol’ internet and you’ll find hundreds of photos depicting all sorts of fun uses for bell jars. As I said, they have a wonderful ability to make anything that you put inside them feel immediately special and interesting.    

I decided to try something with butterflies. A delicate subject for my delicate glass dome! (Also, I had purchased a pretty little butterfly made out of feathers while I was visiting Calgary last winter and I still hadn’t found a way to use for it. So I felt that the time had come!)

I started by painting the base white (using latex paint). When the paint was completely dry I sanded the base with a 60 grit sand paper to distress it.

I gathered some branches from the woods and placed them together to form a little ‘tree’.

The next step: using a glue gun I glued the branched together and glued ‘tree’ in place at the centre of the base.

Here is the tree before I attached the butterflies.

I collected a number of butterflies, some made of paper, some made of feathers. (You can usually purchase butterflies at flower shops or craft stores -like Michaels- in the floral section, since they’re meant as floral decor). I used the glue gun to attach the butterflies and then simply put the dome back in place. Finis!

My Leaded Glass Window

You know, when we finally got the kitchen island and the stools in place I was pretty satisfied. I thought, and I believe I even wrote, that there was now perfect division between the ‘rooms’ or areas in our open concept home. However, it wasn’t long before I started to think, ‘hmmm….. something is missing…..’.

That little inkling is the best/ worst part of creating and designing your home. It’s the best because there’s always an exciting new project on the horizon, and the worst because in the back of your mind you always know that you might never actually be finished. And so it goes with me. There’s always something.

So, with our island in place (and still minus the ikea butcher block counter top), I began to ponder: how could we further define the space? It’s looking a little bare here, don’t you agree?

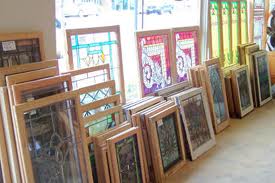
Now, it is a true fact that one thing I have always wanted in my home is an old leaded glass window. The kind of old window that is rich in history and design. I often look for these window pieces at antique stores and thrift shops. I see quite a few in my travels (it’s my guess that the buildings they were once attached to have been done away with, but these windows, some of which are stained glass, are too beautiful to go to the grave, and so they live on in junk shops). I have seen many that were nice and just not for me, others that were too expensive and out of reach. Here’s a picture example of what I’m talking about:

As you may have guessed, I realized one afternoon, that the perfect thing- the most greatest loveliest thing- would be to FIND one of these windows and hang it over the kitchen counter island!

The search had barely begun when Chris and I took a trip down to Niagara Falls and Niagara on the Lake for two days at the end of this summer. There is an absolutely wonderful antique store out there in wine country that we always have to visit when we make a trip down that way. Last year, it was the place that we found the large hall mirror, and this year, miracle of miracles, the place turned up a leaded glass window!

I bought it immediately and brought it home.

I know, I know, it is perfect. Exactly what I was waiting for all those years….

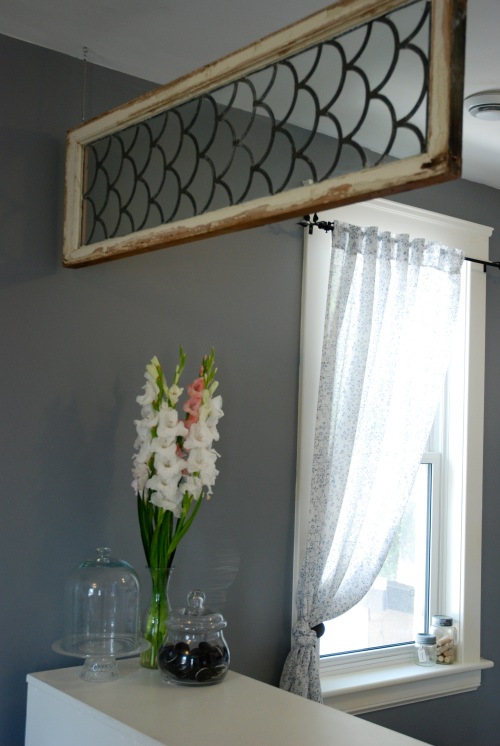
That leaded scalloped pattern– what can I say? It’s understated, of course. It’s classic and chic, yet it’s fun and a bit flirty, no? One might almost call it feminine, but make no mistake, it is sharp and bold! It’s the coolest damn window I’ve ever come across!  And I talked the shop owner into selling it to me for $150 cash!   I may need to go lie down now….

We hung the window up immediately when we got home from Niagara. (Special mention goes out the Chris who drove us all the way home and then got talked into not only hanging up a 20 lb. window but was also nice enough to stop at the store so we could get the proper hanging hardware).

Hanging was fairly simple. We put two eye hooks into the top of the window frame, one on each end. From there, we took measurements and put two respective eye hooks (with plugs) in the ceiling. Four S hooks were used to connect each eye hook with the lengths of chain that we had cut for this purpose. Here is a photo of one end:

At the top of the photo: the ceiling with plug (can’t be seen) and eye hook. An S hook connects the hook with the chain.  At the bottom, an S hook connects the chain with the eye hook. The eye hook is screwed tightly into the window frame.

All in all, it was fairly easy to do. And the finished product was just as sweet as I’d imagined it!

u

I took these photos a few days after we hung the window. It was a sunny morning, perfect for taking pictures. I also happened to have some very pretty gladiolus in the house, and couldn’t resist taking a few shots of them too!

Hope you enjoy.

What item have you always been dreaming of adding to your home?

Kitchen Art: Recipes

Choosing art for the home is one of my favourite things to do. Yes, it can be very challenging to find pieces that speak to you and that will also look great in a room. BUT, if you don’t set a deadline for yourself, that is, if you wait for the art to come to you, it can be really fun, exciting and rewarding. Who knows what you may come across in your travels! Art can be anything: a unique old plate hung on the wall, a child’s drawing, or a framed postcard from a favourite holiday. Once you start thinking outside the box, those bare walls don’t seem so scary anymore!

For kitchen artwork, I then towards the simple and the whimsical. Who needs large daunting abstract paintings in a kitchen? Not me. In a dinning room? Definitely. But a kitchen? Nope! I find that in a kitchen, there’s already so much going on. Everything from appliances to funky toasters to fruit bowls serve as visual interest pieces. For that reason, I like to keep art clean and simple. Recipes, wall plates, drawings– these are my favourite kitchen art pieces.

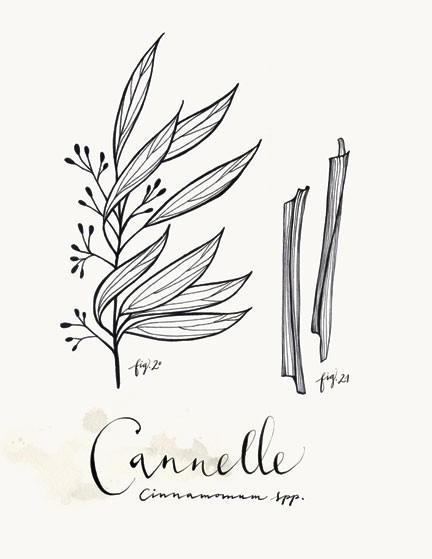
If you wander over to etsy and look up Eva Juliet  (search the evajuliet shop on etsy) you’ll find the type of art prints that I speak of. I really enjoy her whimsical recipes prints; her style is folky yet simple and clean. Maybe I’ll just let the pictures speak for themselves. Here are a few examples:

Simple, pretty pieces, perfect for a kitchen spaces that are bursting with functionality and usefulness, but lacking in personal style and interest. Her prints (unframed) sell for around $30 USD, making them a great way to add some flair without spending too much. However, it is also possible that you could use these prints, simply as a guide. Let them inspire you to create something of your own…

Wouldn’t it be a great interest piece if you framed one of your grandmother’s or mother’s old recipes cards? (They always had such impeccable handwriting!). Think a simple frame with an oversized matte and the recipe card right in the centre. Or what if you had your children draw a picture of one vegetable in particular. You could ask them to take a single piece of paper and draw only carrots or only egg plants and see how those focused pieces turn out. Children have a natural way of abstracting forms (such as a vegetable) that’s very artistic, beautiful and thought provoking. Frame a few of those pieces; A Study of a Carrot;  Study of an Egg Plant No. 1, and voila! Instant art!

BUT- if you don’t have any children, AND you are a die hard DIYer, then you will just have to do the print yourself.

I was so in love with Eva Juliet’s recipe print (Potage aux Carottes) that I decided to do a similar one for myself. Ugh, I know, I know. What could be lower than copying someone else’s art? Well, lots of things, actually. But still, I don’t like to make art that is simply a copy. Art is all about imagination and creativity! In this instance, however, I was not interested in art, I wanted something that  I couldn’t afford, so I made it myself. There. — I justified it

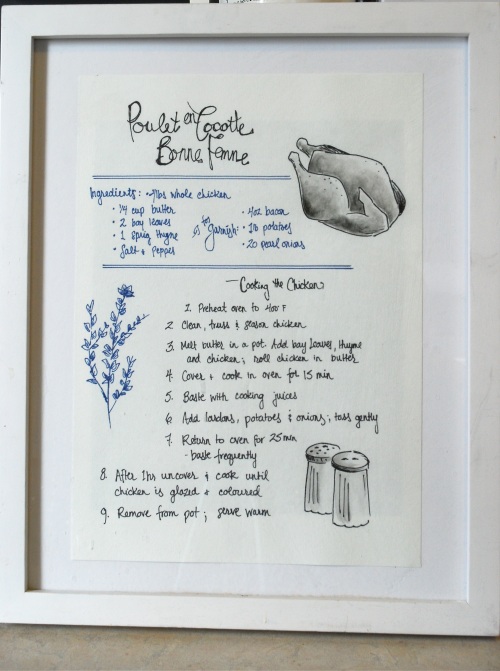
Let’s move on, shall we? I asked Chris to find a traditional recipe that he loves. He came back with a simple french recipe: Poulet en Cocoette Bonne Femme. It was a perfect recipe to ‘draw’, what with it’s rolly-polly french title and minimal ingredients. I wrote out the recipe in my best ‘whimsy’ hand writing, stuck to the blue and black colour scheme and choose which ingredients to illustrate. (I felt the chicken, thyme and salt and pepper would turn out pretty well). Here is the result:

I put the drawing in this white frame I had kicking around and simply laid it on top of the white matte, since it was too large for the matte window.

Here is sits on the counter with my favourite white tea pot. Just a touch of fun and personality in a busy kitchen!

Kitchen Stools Upcycle! (With How-To for Refinishing Wood)

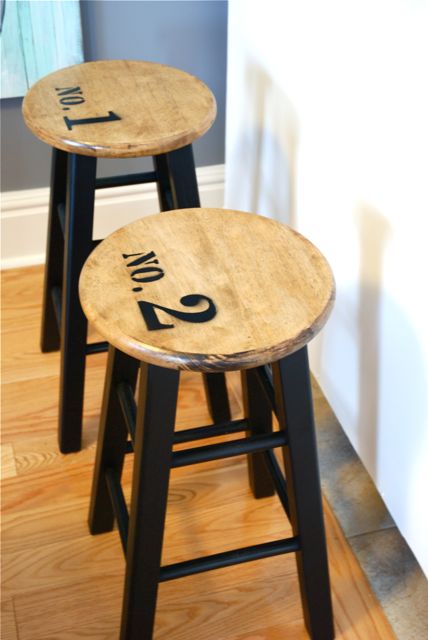
The 0h-so-of-the-moment ‘Numbered Kitchen Stools’!
With an open concept home like ours, the dining area flows into the ‘living room’ which flows into the kitchen. I find it’s important that each area has it’s own points of interest and style, but that overall the whole concept works together. When we moved into our apartment, we found that the kitchen flowed into the living space a little” too freely”, ie. there was nothing to define where the kitchen began and the living room ended, other than some not-so-hot tile flooring. So when we finally found an old side board that would double as a kitchen counter island, it was a pretty great day! The space was divided! And it looked phenomenal. Now we not only had flow, we had division. It was perfect.

With the island taken care of, I knew it was time for us to begin the search for some stools. I love getting up in the morning and being able to sit in the kitchen. It’s the best way to start the day. You can have a tea, read something, and eat your breakfast, and it’s all so easy to do, because you’re sitting at the kitchen counter. (As opposed to sinking into the couch; the couch is too similar to the bed, it makes we want to be back in bed).

A week of searching on Kijiji yielded zero results. However, my stars must have aligned this month, for it was time for the much much anticipated annual church community ‘yard’ sale. The entire church (and it is a big church) is filled with the patrons junk. Rooms upon rooms just bursting with treasure. I love it. I dream about this event. And yes, I take it very seriously. This year we went early and waited in line. Next year, we’ll probably set up camp and sleep over night so that we the FIRST people in the door. Now, as you’ve probably guessed, two simple yet perfect stools were found at the sale. At ten bucks each they weren’t super cheap, but I was fairly desperate. So for a crisp twenty I came home with two kitchen stools.

It was my first instinct to just enjoy them for awhile, but I decided to take them apart and get to work. Chris removed the seats and we worked with them like that, in two parts. First the seats had to be striped. The stools looked quite bare, but even the simplest wood pieces will have a coat of some sealant on them which makes it necessary to strip them in order to ‘start from the beginning’ with the wood and achieve the look you are after. So we got out the chemicals and the gloves and removed the sealant. It was fairly straight forward. We had some trouble running our very straight putty knives (which we use to lift up the paint/urethane etc from the wood) on the very round edges of the seats. But other than that, it was all good. Once we had removed the sealant, (think of it was the hard shiny surface), we cleaned the wood with a bit of paint thinner and steel wool and it was back to it’s simple perfect self. Not the most amazing grain ever, but it was wood and that was good enough. From there I put on one coat of dark walnut stain. I brushed it on, left it for just under twenty minutes and wiped it off with a clean dry cloth. The result was good, the wood soaked up a lot of the stain, and I was happy with the colour. Next came the design for the seat. I went through a few different ideas, but I decided to try out the ‘numbers’ trend. I’m sure you’ve seen evidence of this trend somewhere, numbered coffee mugs, chairs, coat hooks. It’s a fun trend because you can number anything! Endless possibilities.

I decided on a design and got to work. I had some industrial style letter stencils lying around so they were used for the ‘NO.’ and I printed the ‘1’ and ‘2’ out in large font on the computer (make sure if doing this to only print an outline so as not to waste ink). I carefully cut out the numbers and thus a stencil was created! From there I taped the whole design onto the stool using painters tape. A quick coat of my beloved ‘Flat Black’ Krylon spray paint and five minutes of dry time later and I was able to lift off my stencil and see the results! I was pretty impressed with the outcome, if I do say so…

The final step, was simply coating the the whole seat with a sealant. I waited twenty four hours after spray painting and used my stand-by sealer, the Minwax Water-based Polycrylic. One or two coats of that stuff (use a soft bristle brush or a sponge brush for best results) and you have a lovely hard surface with a great sheen. And of course, the wood is protected.

The seats were finished! Now it was time to focus on the bottoms of the stools. They were much more straight forward. I simply sprayed on a light coat of spray paint primer. I let the primer dry and then finished up with about three very light coats of Krylon Flat Black. I say three light coats because with spray paint it’s not about getting the entire surface covered in one go. Just spray lightly and if spots are missed, don’t worry, you’ll cover them with the next round. The problem with trying to spray everywhere in one round, is that while trying to paint the hard-to-get-to spots, you inevitably spray over other spots again and again. In those areas, the wet paint collects and starts to run and flow– and that’s when you get drips while spray painting. So just restrict yourself to light imperfect coats, and the result will be a perfect final product. I didn’t bother to seal the legs of the stools. The spray paint is fairly tough, and being legs they don’t get a lot of wear the way a seat does. Chris put the stools back together using a bit of wood glue and the original screws.

Here are my step-by-step photos instructions of the entire process:

The original stools. Perfect, in size and shape, but just a bit boring.

The stools after disassembly.

All the supplies needed for stripping the finish on the seats. Heirloom stripper, paint thinner, putty knife, mask, and heavy rubber gloves.

This is the product (Heirloom Furniture Stripper) that I use for stripping, I am always happy with the results.

I applied the stripper with a cheap bristle brush. After application, the chemicals must sit for a few minutes. The finish usually begins to lift very quickly.

When I saw the the finish begin to lift, I waited another minute and then began to scrape the finish off with a putty knife. (When finished, you may need to repeat the process from the beginning until there is no finish at all. Steel wool is also helpful in place of the putty knife, for those tricky spots). After all finish had been lifted, I dampened a clean cloth with paint thinner and wiped down the entire surface of the wood.

To stain the wood, I chose my stain colour (I used Minwax Dark Walnut here), then applied  it to the unfinished wood with a brush. I like to use a bristle brush, others prefer a sponge brush, both work well. I let the stain sit for 15-20 minutes before wiping it off VERY thoroughly with a clean dry cloth.

For the stencil, I printed numbers (outlines only to save ink) in large font.

My makeshift stencil– all cut out and ready to use.

In addition to my homemade stencils, I also used simple craft stencils. The ‘design’ was carefully laid out and held in place with painters tape.

Here you can see the design taped in place.

I covered the exposed area with paper towel to keep it safe from spray paint overspray.

After spray painting, I waited a few minutes and then carefully removed the stencils and paper towel. This was the result!

I let the spray paint dry for 24 hours and then brushed on two coats of Minwax Water-based Polycrylic.

The legs after a light coat of spray paint primer.

The legs received about 3 light coats of Flat Black Krylon spray paint and then the stools were reassembled. Aren’t they pretty?

At last– the stools become a part of our place.

We have come to the end of this beautiful story of a girl and her kitchen stools! Or perhaps it is just the beginning…

The Tale of the Ugly Chair

This was a simple project that I took on this winter, so I will keep this post simple as well. To begin, the chair was hideous. So ugly in fact, that I don’t think I would have purchased it from the thrift store myself. But luckily it was my mom who picked it up and brought it right to my front door. She didn’t even ask me to pay her back the couple of dollars that she spent on the old beast, so I figured I should try my best bring out the thing’s inner beauty.

It was a very straight-forward project- which almost never happens- there’s always that long drawn out hunt for the right hardware, AND it often happens that the proper screw cannot be found anywhere in the house and several trips to the store must ensue (over the course of days, obviously) AND there’s always the times that I completely misjudge a paint colour and absolutely cannot proceed. Sigh. Just the thought of it all. It’s all a little too familiar, no?

Anyway, this one was a breeze!

I’ll provide you with the details in a simple photo step-by-step:

‘The Beast’

In all it’s glory– some sort of floral faux velvet fabric on the cushion, a shiny, orangey finish on the wood– dear heavens….

Any seat can usually be removed with a minimum of effort, just turn the chair upside down and find the right screw driver.

I applied the usual latex (water-based) primer. For this project I had the primer tinted in a dark grey.

When the primer had dried I applied two light coats of latex white.

By brushing lightly in some areas, and wiping some of the wet paint away in other areas, I was able to get some of the grey to show through.

I also used a piece of 60 grit sandpaper to sand down some of the edges and the detail work. The result was just a touch of bare wood showing through the layers of paint.

Next it was time to tackle the seat cushion.

To remove the old fabric, I used a flat head screw driver and a pair of pliers.

I used the screw driver to pry up the old staples–most upholstery is held in place with staples– and when I had trouble with a staple, I simply used the pliers to work the staple until it came loose.

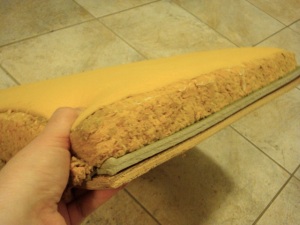
The cushion with fabric removed. Ugly old foam, but still fully functional.

The seat before I began to reupholster it.

I choose a simple mint green fabric for the seat. It was a heavy cotton jersey-like fabric with just a touch of stretch to it. And I choose it because it was on sale for less than $3 a meter. (Of course it’s cute too).

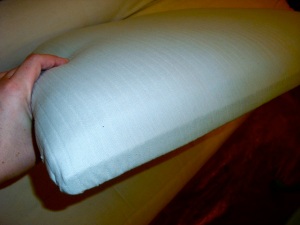
For the reupholstery I laid the seat face down on the back side of the fabric and simply pulled it tightly around the square. I started by putting a few staples in the middle section of each side, and once each side had a few staples in it, I worked my way around, pulling the fabric tightly and stapling all around.

Not the greatest photo, but the corners are folded neatly and tightly, and stapled in place. Then the excess fabric is cut away.

The last step was a quick reassembly of the seat and body of the chair.

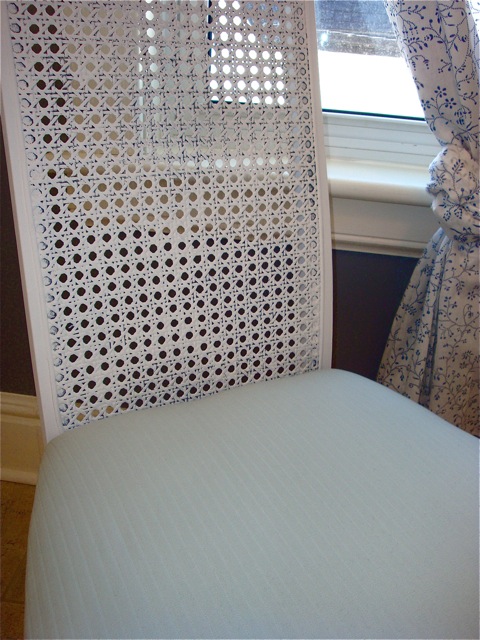
The final product! Kind of a sweet little piece, ain’t she?

A few close-ups.

This nice little makeover story has a happy ending too: One week after cute chair was completed I posted these pictures of the Beast turned Beauty on Kijiji and a nice lady came and bought it (!) ( for $40) and took it home to put in her newly decorated bedroom. Aren’t chair-y tales the sweetest?

A Valentine’s Gift for Chris

This winter money was tight, so when Valentine’s Day came around I decided that I should make (not buy) a gift for Chris. I ended up taking on a fun little project, so I thought I would share it.

Chris had come across an image something like the one below on a friend’s facebook page and he mentioned that he liked it…

I decided that I would recreate the picture as a gift. All I needed to do was figure out how I was going to do that.

I didn’t like the idea of sketching or drawing the picture; being such a simple image, I feared a sketch might look inconsequential. But then painting didn’t really seem right either.

A few days later I was in our local FabricLand store, looking for material to use for an upholstery project, when I spotted some burlap among the samples. It was very nice; tightly woven and almost grey in colour.

I knew exactly what I could use it for.

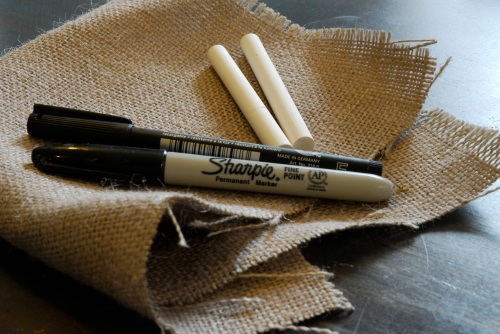
At home, I rounded up my supplies: Black permanent markers, some sticks of white chalk and the newly purchased burlap.

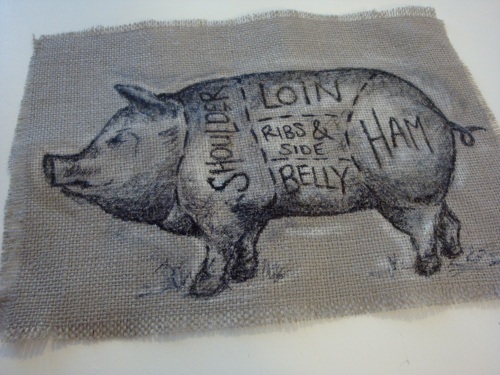
I laid the burlap out flat and sketched out the image of the pig. I used the black markers to outline and create shadow and texture and I finished up with the chalk which created highlights. The result was this:

I was pretty darn happy with the outcome, I must say! Chris loved it too and not long after, we found a frame for it and hung it on the gallery wall.


Happy Valentine’s to All!